Thursday, April 6, 2017

Alkaline Green Smoothie ...Makes Your Belly Smile!

Healthy “Limeade” Smoothie Recipe:


Are you familiar with the pH Miracle? It’s all about balancing the alkaline levels in the body be, which can be done through diet, supplements and alkaline water – higher pH. For instance, when the body is more acidic, it can be more susceptible to diseases or illnesses.


INGREDIENTS:
  • 1/2 english cucumber, sliced
  • 1/2 avocado
  • 2 handfuls baby spinach
  • 3-4  limes, peeled  (adjust to desired amount)
  • 1/2 teaspoon cinnamon
  • Honey (1 tbsp) or to taste [or liquid stevia, agave, or natural sweetener of choice]
  • 6-8 ice cubes


DIRECTIONS:
In blender, add cucumber, avocado, spinach, lime [all three, but peeled], cinnamon, stevia, ice and  blend on high until smooth.

If it’s too think,  I’ll add about 1/2 cup of cold water.
Once it’s all blended, pour into a large glass and enjoy!

TIP:
During the 30 day detoxification period, choose a smoothie blend once per day as a Meal Replacement.  Follow with Ultra Detox Bath once per week for 6 weeks.

ULTRA DETOX BATH
      • 30 Min Detox Bath recommended once a week for 6 weeks
      • Ingredients: Hot-Warm Water, 2 to 4 cups Epsom Salt, 8-12 Drops of 2 Essential Oils (Lavender, Chamomile, Lemon Balm, or Orange Blossom), ½ cup of White Vinegar, ½ cup of Baking Soda (optional)

Friday, February 17, 2017

HOW TO MAKE BONE BROTH TO HEAL YOUR GUT, MIND, BODY & SOUL!


Related image

WHY BONE BROTH?
Making your own bone broth is extremely cost effective, as you can make use of left over carcass bones that would otherwise be thrown away.   It can also save you money by reducing your need for dietary supplements.    Bone broth provides you with a variety of important nutrients such as calcium, magnesium, chondroitin, glucosamine, and arginine that you may otherwise be spending a good deal of money on in the form of supplements.

Ingredients:
  • 2 pounds (or more) of bones from a healthy source
  • 2 chicken feet for extra gelatin (optional)
  • 1 onion
  • 2 carrots
  • 2 stalks of celery
  • 2 tablespoons Apple Cider Vinegar
  • Optional: 1 bunch of parsley, 1 tablespoon or more of sea salt, 1 teaspoon peppercorns, additional herbs or spices to taste. I also add 2 cloves of garlic for the last 30 minutes of cooking.

You'll also need a large stock pot to cook the broth in and a strainer to remove the pieces when it is done.

bone broth vegetables

Instructions
  1. If you are using raw bones, especially beef bones, it improves flavor to roast them in the oven first. I place them in a roasting pan and roast for 30 minutes at 350.
  2. Then, place the bones in a large stock pot (I use a 5 gallon pot). Pour (filtered) water over the bones and add the vinegar. Let sit for 20-30 minutes in the cool water. The acid helps make the nutrients in the bones more available.
  3. Rough chop and add the vegetables (except the parsley and garlic, if using) to the pot. Add any salt, pepper, spices, or herbs, if using.
  4. Now, bring the broth to a boil. Once it has reached a vigorous boil, reduce to a simmer and simmer until done.
  5. During the first few hours of simmering, you'll need to remove the impurities that float to the surface. A frothy/foamy layer will form and it can be easily scooped off with a big spoon. Throw this part away. I typically check it every 20 minutes for the first 2 hours to remove this. Grass-fed and healthy animals will produce much less of this than conventional animals.
  6. During the last 30 minutes, add the garlic and parsley, if using.
  7. Remove from heat and let cool slightly. Strain using a fine metal strainer to remove all the bits of bone and vegetable. When cool enough, store in a gallon size glass jar in the fridge for up to 5 days, or freeze for later use.


TRY IT OUT FOR YOURSELF!

Image result for how to make bone broth

Wednesday, August 24, 2016

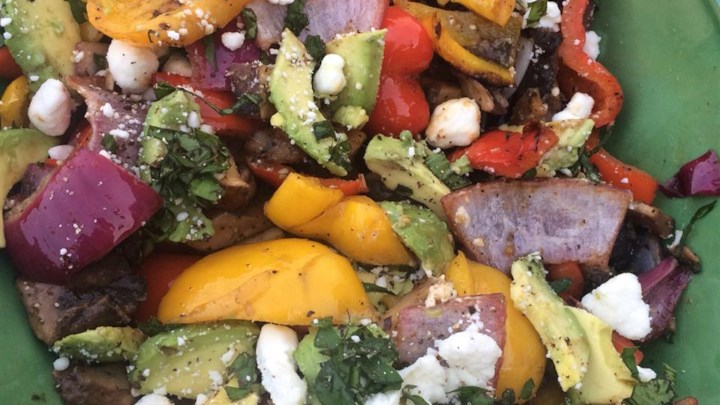
SMOKEY GRILLED VEGETABLES AND CHICKEN WITH SUMMER SUCCOTASH

Try This Quick FAT-BURNING Meal....Made Within Minutes!


Preparation Time: 25 mins
Calories: 388

Servings: 6


INGREDIENTS:

·         3 Skinned Chicken Breast (Free Range/Organic)
·         2 Limes, Juiced
·         ½  Cup Basil Leaves
·         2 Tablespoons Grill Seasoning
·         1 Cup Frozen Lima Beans
·         2 Cloves Garlic, Minced
·         ½ Cup Corn
·         1 Pinch Cayenne Pepper, Or To Taste
·         1 Pint Grape Tomatoes
·          2 Tablespoons Balsamic Vinegar
·         6 Portobello Mushroom Caps
·          1 Avocado (Organic) - Peeled, Pitted, And Cubed
·         4 Red Bell Peppers, Cored And Quartered 1 Red Onion, Thickly Sliced
·          ½  Cup Crumbled Goat Cheese
·         1  Cup Olive Oil
·         2 Limes, Juiced
·         Freshly Ground Black Pepper To Taste
·         2 Tablespoons Finely Chopped Fresh Basil


Great Grilled Smoky Vegetables with Avocado and Goat Cheese Crumbles

DIRECTIONS: 

Grilled Chicken and Succotash

  1. Place a grill pan over high heat. Season 4 thin chicken cutlets (about 1 pound total) with 1/4 teaspoon each salt and pepper. Grill until cooked through (about 3-4 minutes), turning once. Meanwhile, heat 1 tablespoon olive oil in a large skillet over medium-high.
  2. Add in 1 cup frozen baby lima beans, thawed; 1/2 cup corn; and 1 pint grape tomatoes. Cook, tossing occasionally, until tomatoes burst (about 3-4 minutes). Stir in 1 tablespoon grated Parmesan and 1/2 cup fresh basil leaves, torn.
  3. Optional: Pair each portion with lemon wedges and a 100-calorie whole-wheat roll.


Smokey Grilled Vegetables and Avocado

  1. Place mushrooms, red bell peppers, and red onion in a 9x13-inch baking dish. Whisk olive oil, lime juice, grill seasoning, garlic, and cayenne pepper in a small bowl; pour over vegetables. Toss to coat and allow vegetables to marinate for at least 30 minutes.
  2. Preheat grill for medium heat and lightly oil the grate.
  3. Remove vegetables from the marinade, and shake off excess. Reserve remaining marinade.
  4. Grill vegetables on preheated grill until tender, about 5 minutes. Transfer grilled vegetables to a large platter. Whisk remaining marinade with balsamic vinegar; pour over vegetables. Top with avocado and goat cheese, then season with salt and pepper. Sprinkle with basil to serve.
  5. TIP: Asparagus and Zucchini are EXCELLENT additions to include! 


FOODS MADE TO PERFECTION!!!

LEARN MORE
832-913-5022

Sunday, May 8, 2016

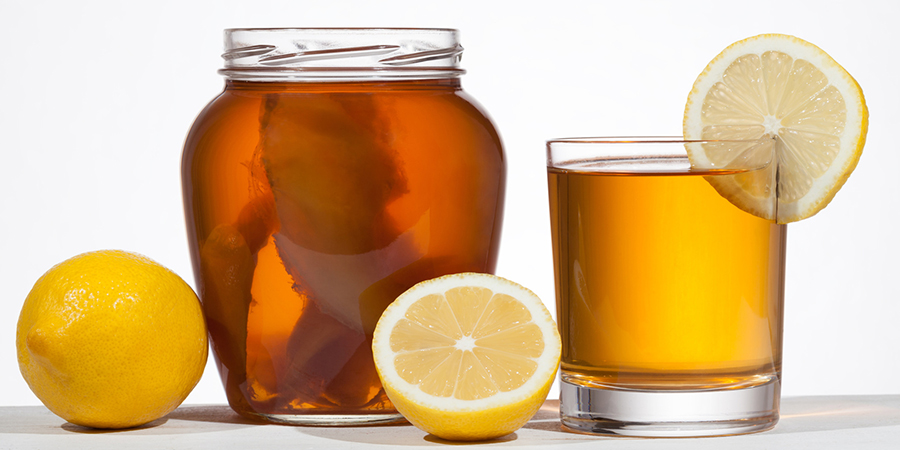
HOW HOMEMADE KOMBUCHA CAN PROMOTE HEALING TO DIGESTIVE HEALTH

BACKGROUND:

The definition of fermentation is "breaking down into simpler components". Fermentation makes the foods easier to digest and the nutrients easier to assimilate. In effect, much of the work of digestion is done for you. Since it doesn't use heat, fermentation also retains enzymes, vitamins, and other nutrients that are usually destroyed by food processing.
The active cultures that pre-digest the food as part of the fermentation process actually generate nutrients. So there are more vitamins--especially B-vitamins--and minerals like iron are released from the chemical bonds that prevent them from being assimilated. In effect, the nutritional value of a food goes up when it has been fermented. 


KOMBUCHA
A fizzy, fermented black tea that gives you a bang for your bacterial buck because of the variety of microorganisms it contains. "When you drink a bottle of kombucha, you're drinking four to seven microorganisms all at once, building a really strong gut."


 WHAT IS KOMBUCHA TEA?
·         Kombucha starts out as a sugary tea, which is then fermented with the help of a scoby. "SCOBY" is actually an acronym for "symbiotic culture of bacteria and yeast." It's very close cousins to the mother used to make vinegar.

The scoby bacteria and yeast eat most of the sugar in the tea, transforming the tea into a refreshingly fizzy, slightly sour fermented beverage that is relatively low in calories and sugar.


WHAT ARE SOME BENEFITS?

Although scientific evidence is scarce, kombucha is reported to Increase Energy, Improve Eyesight, Aid In Weight Loss, Assist Cancer Recovery, Strengthen The Immune System and Improve Digestion.

PROBIOTICS?
  • Which brings us to the next question: what's actually in kombucha? Kombucha is indisputably full of probiotics and other happy things that our intestines love and that help boost our overall health. 
  • Claims that kombucha cures things like arthritis, depression, and heart burn have less of a proven track record, but hey, our bodies are all different and I say go for it if it works for you.


How to make your own Kombucha Tea: 14 Day task
INGREDIENTS:
3 Quarts Water
1-2 Cup of  Organic Cane Sugar
2-4  Bags of Green, Black or White Tea
1 cup Kombucha Mother (unpasteurized store-bought neutral-flavored)
Optional flavoring extras for bottling: 1 to 2 tbsp flavored tea (hibiscus, ginger), ¼ cup honey, 2 to 4 tbsp fresh herbs

MATERIAL:
Stockpot
1 gallon Glass Jar or 2-quart Glass Jar
Coffee filters or Cheesecloth
Heavy duty Rubberband
Marker
Small Strainer
Measuring cup
Bottles: 16 oz with lids

Instructions:
1. Make the Tea Base: Fill a large stockpot with one gallon of water and add 1 to 2 cups sugar. Cover and heat until the mixture comes to a boil. Boil for 15 mins to kill any contaminants.
Turn off the heat add two to four teabags of green, white or black tea. Allow the mixture to cool completely and strain out the teabags.
 
2. Add Kombucha MotherPour the sugar-water-tea mixture into a large jar containing your kombucha mother and at least ten percent kombucha tea. Cover the mouth of the jar with cheesecloth or a coffee filter and secure with a large rubber band. Make note of the day you started it. (Note: The mother tea makes the liquid acidic, which prevents unfriendly bacteria from taking up residence in the first few days of fermentation.)
 
 
3. Ferment for 7 to 10 days:  Kombucha can be aged from 10 days to one month. It will become more sour with age; smell and taste it every few days to determine what you like best.  Store the jar in room temperature out of direct sunlight. 
 
4. After seven days, begin tasting the kombucha daily by pouring a little out of the jar and into a cup. When it reaches a balance of sweetness and tartness that is pleasant to you, the kombucha is ready to bottle.


TIPS & WARNINGS:

5. Bottling Kombucha:  Place the small strainer over the top of a measuring cup and pour the kombucha through it, along with any juice or herbs you want to use for flavoring.  Optional; Keep about ten percent of the liquid with the mother to start the next batch.

6. Carbonate the Finished Kombucha:  Transfer the strained kombucha liquid into clean bottles. Fill each bottle to the shoulder and seal it tightly. This will allow the kombucha to carbonate. Label the bottle with the date you bottled it and store in room temperature out of direct sunlight (5 to 7 days).

7. Refrigerate the Finished Kombucha:  The kombucha is carbonated when the bottles feel rock solid.  Refrigerate to stop fermentation and carbonation. 

Always handle your kombucha mothers with clean hands and never store kombucha in a metal container. Kombucha is acidic and contains a small amount of alcohol -- approximately one to one and a half percent. Kombucha mothers occasionally mold, throw away the liquid it is in and start over.

LEARN MORE AT: RoyalHealingND.com

Saturday, April 23, 2016

FLAXSEED OIL BASIC SALAD DRESSING


INGREDIENTS:

5 tbsp Organic Flaxseed Oil
1 1/2 tbsp Lemon Juice
1 tbsp Chopped Chives
1 Medium Garlic Clove, Crushed
Pinch of Seasoned Salt or Goya Salt-Free Vegetable Seasoning
1 tbsp Chopped Parsley
Freshly Ground Pepper to Taste

DIRECTIONS:
Place all ingredients in a salad bowl and whisk until smooth and creamy.  
Jazz up this basic recipe to your own personal taste by using your favorite herbs and spices.
Try it drizzled over greens or steamed vegetables. 


Dr. Ezzy
832-913-5022

Monday, April 18, 2016

MAPLE CANDIED SWEET POTATOES


PREPARATION TIME: 1hr 45 mins
SERVING: 8

INGREDIENTS;

1/2 cup Organic Butter
4 or 5 large fresh Yams/Sweet Potatoes
1/2 cup 100% Maple Syrup
2 tbsp Dark Brown Sugar
1 tsp.Cinnamon 
1 tsp. Vanilla
1/4 tsp. Freshly Grated Nutmeg
1/2 tsp. Freshly Grated Ginger Root
1/2 tsp. Sea Salt
1/4 cup Crushed Raw Pecans 


DIRECTIONS:

Preheat oven to 400°F.
Peel yams or sweet potatoes (either may be used). Cut into 1 inch cubes or wedges.  


Butter a 9x13-inch baking dish generously.
Arrange yams in baking dish.

In a saucepan, melt butter, pecans and stir sugar until dissolved over medium heat. Add 1/4 cup water and spices.

Bring to a boil, add maple syrup; reduce heat to a simmer and cook for 2 minutes. Pour butter mixture over the yams, turning them over to coat well. Cover the yams tightly with aluminum foil and bake on center rack in oven, basting the potatoes with the butter syrup once or twice during the baking for about 45 minutes or until fork tender.


When the potatoes are done, remove foil. Bake on the upper third of the oven at 475°F until the syrup has thickened and the potatoes are just beginning to caramelize (about 20 minutes - but watch carefully and do not allow them to burn; if they are browning too quickly reduce oven temperature).

Cooks Note: If adding mini-marshmallows, spread them evenly over the top of the potatoes at this time, and broil for 5-10 minutes or until lightly browned.

Baste with additional butter before serving.
Variation: Use honey or Karo syrup instead of the maple syrup; add 1/4 cup frozen orange concentrate. Omit cinnamon; use vanilla.

BENEFITS OF EATING SWEET POTATOES:
Image result for sweet potatoes


  • Orange-fleshed sweet potatoes may be one of nature's unsurpassed sources of beta-carotene. Several recent studies have shown the superior ability of sweet potatoes to raise our blood levels of vitamin 
  • A. They are also a very good source of vitamin C, manganese, copper, pantothenic acid, and vitamin B6. Additionally, they are a good source of potassium, dietary fiber, niacin, vitamin B1, vitamin B2, and phosphorus.
  • It can be helpful to include some fat in your sweet potato-containing meals if you want to enjoy the full beta-carotene benefits of this root vegetable. Recent research has shown that a minimum of 3-5 grams of fat per meal significantly increases our uptake of beta-carotene from sweet potatoes. 
  • Recent studies show excellent preservation of sweet potato anthocyanins with steaming, and several studies comparing boiling to roasting have shown better blood sugar effects (including the achievement of a lower glycemic index, or GI value) with boiling. The impact of steaming is particularly interesting, since only two minutes of steaming have been show to deactivate peroxidase enzymes that might otherwise be able to break down anthocyanins found in the sweet potatoe.
  • In fact, with these peroxidase enzymes deactivated, natural anthocyanin extracts from sweet potato used for food coloring may be even more stable than synthetic food colorings. 
  • This benefit isn't limited to the food's appearance since the anthocyanins have great health benefits as antioxidants and anti-inflammatory nutrients.

Dr. Ezzy
832-913-5022

Friday, April 8, 2016

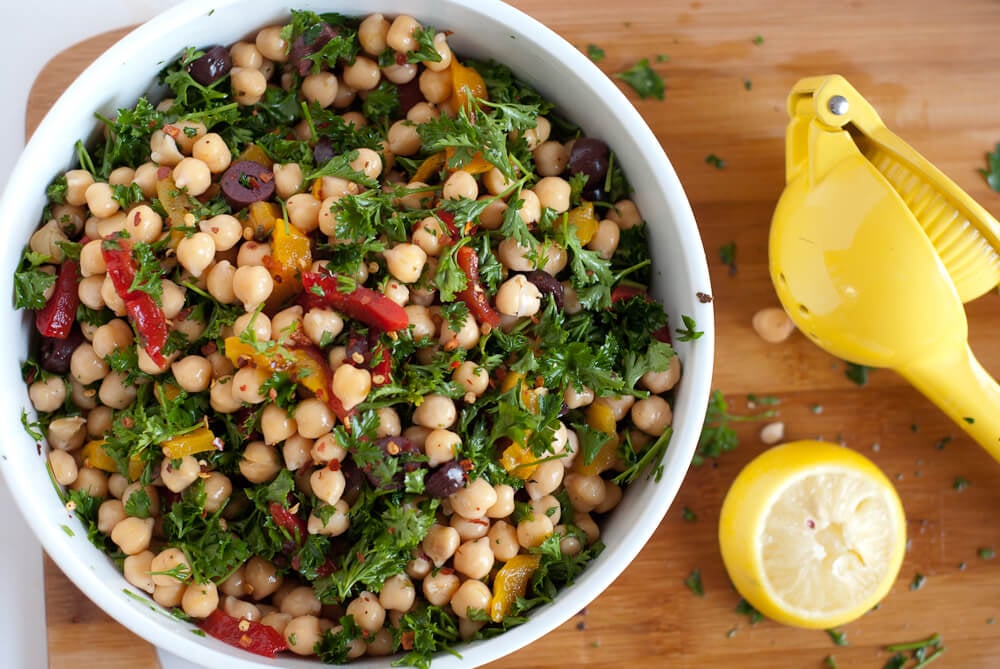
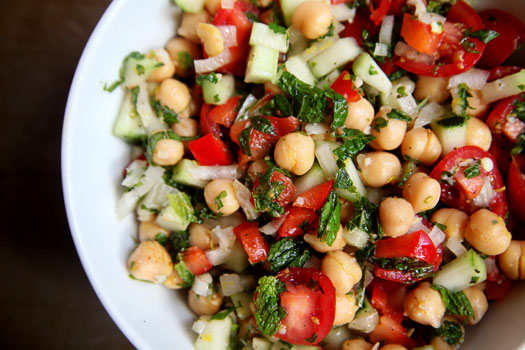
CHICKPEA SALAD WITH RED ONIONS


Prep: 15 min
Yield: 6 servings


INGREDIENTS:
1  15.5 oz can, Chick peas, drained and rinsed or seasoned with olive oil
Chopped everything up small
1/2 cup red pepper
1 small red or sweet onion
1 med cucumber
(Add 1 Apple for more sweet crunch)
(I added a bowl of chopped spinach)
1Tsp balsamic vinegars
1/2 Tsp Tumeric
1 clove garlic, minced or grated then grinded into a paste with salt
1 tbsp cilantro or parsley  
¾ Fresh squeezed lemon juice
3 tsp olive oil, (I used one since I cooked my beans in olive oil already)
1/4 tsp of garlic powder, oregano, or seasoned to your taste
Sea Salt, Pepper (can added sesame ginger for flavoring)
This makes enough to fit in a large salad bowl  (76 oz Tupperware)


DIRECTIONS:
In a large to medium bowl combine fresh ingredients (chick peas with onions, chopped apples, peppers, cilantro, celery, garlic, red pepper flakes and rosemary). Dress salad with vinegar and oil, salt and pepper.


AMAZING BENEFITS OF EATING RIGHT:  
A good chickpea salad, that is low-fat and high in protein! 


832-913-5022